
 The hubby gave me a real hard time about wanting to make these..."A burger without MEAT???" Indeed. But he sure changed his mind after eating one bite. These are so delicious, nutritious, and filling! Your man of the house will not even miss the meat!
Black Bean Burgers with Lime Cilantro Mayo (from the Cookin' Canuck)
Burgers:
4 pieces day old or toasted whole wheat sandwich bread (I only needed 2)
2 Tbsp olive or canola oil, divided
1 medium onion, chopped
2 cloves garlic, minced
2 Tbsp minced jalapeno pepper, membranes and seeds removed (keep some if you want some heat)
1 tsp ground cumin
1 (15 oz.) can black beans, drained and rinsed
1 1/4 cups cooked brown rice
2 tsp fresh lime juice
1/2 tsp kosher salt
1/2 tsp freshly ground black pepper
1/4 cup chopped cilantro
Cilantro-Lime Mayo:
1/2 cup mayonnaise
2 tsp fresh lime juice
2 Tbsp finely chopped cilantro
1/2 tsp ground cumin
1/4 tsp freshly ground black pepper
4 whole wheat buns (6-8 in my opinion)
1/2 cotija cheese (or feta)
4 large slices tomato
12 slices avocado
Directions:
In the bowl of a food processor, pulse sandwich bread to form breadcrumbs. Pour into a bowl and set aside.Heat 1 Tbsp oil in a large skillet set over medium heat. Add onion and saute until soft. Add garlic, jalapeno, and cumin. Saute for additional two minutes.
Scrape the mixture into the food processor. Add black beans, brown rice, lime juice, salt, and pepper. Pulse until the beans are chopped, but not pureed. Scrape the black bean mixture into a large bowl. Add half of the breadcrumbs and the chopped cilantro. Using a wooden spoon, stir the mixture until combined.
Divide the mixture into 4 equal portions and form into patties (I suggest forming 6-8 patties...or else they are just too big!). If the mixture is too moist to form patties, add more breadcrumbs. Place the patties on a baking sheet lined with plastic wrap (or parchment or wax paper) and cover with additional plastic wrap. Refrigerate for at least 1/2 hour.
Meanwhile, make the cilantro-lime mayo by combining the mayo, lime juice, cumin, cilantro, and pepper in a small bowl. Stir well.
Heat 1 Tbsp canola oil in large skillet (preferably not nonstick, so a good crust can form) set over medium heat. Add the burgers and cook for about 4 minutes per side. (the crust is the best part and gets nice and crisp...another reason why i think making more smaller patties is better than a few big ones)
Lightly toast the buns. Spread 2 Tbsps cilantro-lime mayo on each bun, and top each with a black bean patty, 2 Tbsp crumbled cotija (feta..) cheese, 1 slice tomato, and 3 slices avocado. Serve.
Friday, September 24, 2010
Black Bean Burgers
Thursday, September 16, 2010
Salsa Sombrero
 Last December, Food2 (a baby sister site to Food Network) was holding a competition. The winner would get a trip for two to New York and a chance to see the Food Network kitchens, a year's worth of Food Network magazine, and lunch with Kelsey Nixon. I've wanted to meet Kelsey so bad and with my competitive nature, I got cookin! They wanted your best "party appetizer" and you had to include the recipe, photo, and short description. With the final idea and suggestions from my oldest sister and title input from my family, this is what I submitted:
Salsa Sombrero!

1 tomato-diced
½ onion-diced
1 jalapeno-diced
1 clove garlic-minced
1 can (15 oz.) corn
1 can (15 oz.) black beans
1 package corn tortillas
juice of two limes
zest of 1 lime
¼ cup olive oil
2 Tbsp cilantro-chopped
1 ½ tsp honey
salt, to taste
Combine vinaigrette and pour onto salsa. Let sit for flavors to combine.
Cut tortillas into 2 ½- 3 inch circles. Place tortilla circles in a pan filled with oil to fry. Cook a few minutes, flipping once, until slightly golden brown. Place on paper towel and sprinkle with some coarse salt.
Assemble right before service. Place salsa on top of chip and garnish with fresh cilantro and some crumbled cotija cheese (or feta if cotija is not available). You can also double stack—place salsa on one tortilla and then another tortilla on top, with salsa and then the cheese and cilantro sprig for garnish.
***here's the site on Food2 where it was posted
 I thought I did a real nice job. I even worked real real hard on trying to get good pictures with my point and shoot camera. About a week or two later, I was in the Drexel library and they have a shelf full of magazines. I happened to glance over and this is what I saw:
 My heart started racing and I nervously thought, "no way!!! I...won?!!" thinking that it was MY appetizer on the cover page of this foodie magazine. Upon further inspection, however, it was some other appetizer competition sponsored by that magazine and they were featuring the winner. Her recipe was incredibly similar, but she had tilapia on top as well. I thought it was so funny and so random. Don't they look real similar??
Anywho, the end of the story is that I did not win the Food2 competition, but i WILL go meet Kelsey Nixon on my own before we leave the East Coast. and i really love food competitions.
Sunday, April 25, 2010
Orzo-Stuffed Peppers
 I absolutely love bell peppers (well, as long as they're not the green colored ones) and when I received the cookbook Giada's Kitchen this past Christmas, I knew I had to try out her recipe for stuffed bell peppers. It was delicious!
NOTE: I did not have straight orzo, but I used the "Harvest Grains Blend" from Trader Joe's that has a mix of Israeli cous cous, orzo, quinoa, etc. I'm sure you could substitute another type of pasta or rice if you would like. Also, you could add some meat like ground beef to it, or other veggies (although it is quite delish and filling as is).
Orzo-Stuffed Peppers (from Giada's Kitchen)
1 (28-ounce) can whole Italian tomatoes
2 medium zucchini, grated
1/2 cup chopped fresh mint leaves (I just used basil)
1/2 cup freshly grated Pecorino Romano cheese, plus more for sprinkling (I used Parmesan)
1/4 cup extra-virgin olive oil
3 garlic cloves, minced
1 tsp salt
1 tsp freshly ground black pepper (or less..)
4 cups low-sodium chicken broth
1 1/2 cups orzo (rice-shaped pasta)
6 sweet bell peppers (red or yellow)
1/4 cup chopped fresh basil, for garnish
Preheat oven to 400 degrees.
Pour the tomatoes and their juices into a large bowl and break them into pieces using a pair of kitchen shears or your fingertips. Add the zucchini, mint, cheese, olive oil, garlic, salt, and pepper. Stir to combine.
Meanwhile, bring the chicken broth to a boil in a medium saucepan over high heat. Add the orzo and cook for 4 minutes. The orzo will be only partially cooked. Drain the orzo through a sieve, reserving the chicken broth, and add the orzo to the large bowl with the vegetables. Stir to combine. Transfer the warm chicken broth to a 3-quart baking dish (since there are only two of us, I scaled the recipe down to just 2 bell peppers and then cooked them in individual souffle dishes). Slice the tops off the peppers and remove all the ribs and seeds. Cut a very think slice from the base to help the peppers stand up.
Spoon the orzo mixture into the peppers. Place the peppers in the baking dish with the warm chicken broth. Cover the dish with foil and bake for 45 minutes. Remove the foil, sprinkle each pepper with cheese, and continue baking until the cheese is golden, about 15 minutes. Remove from the oven and carefully transfer the stuffed peppers to serving plates. Garnish with basil, if desired.
Tuesday, March 30, 2010
Puffed Apple Oven Pancake
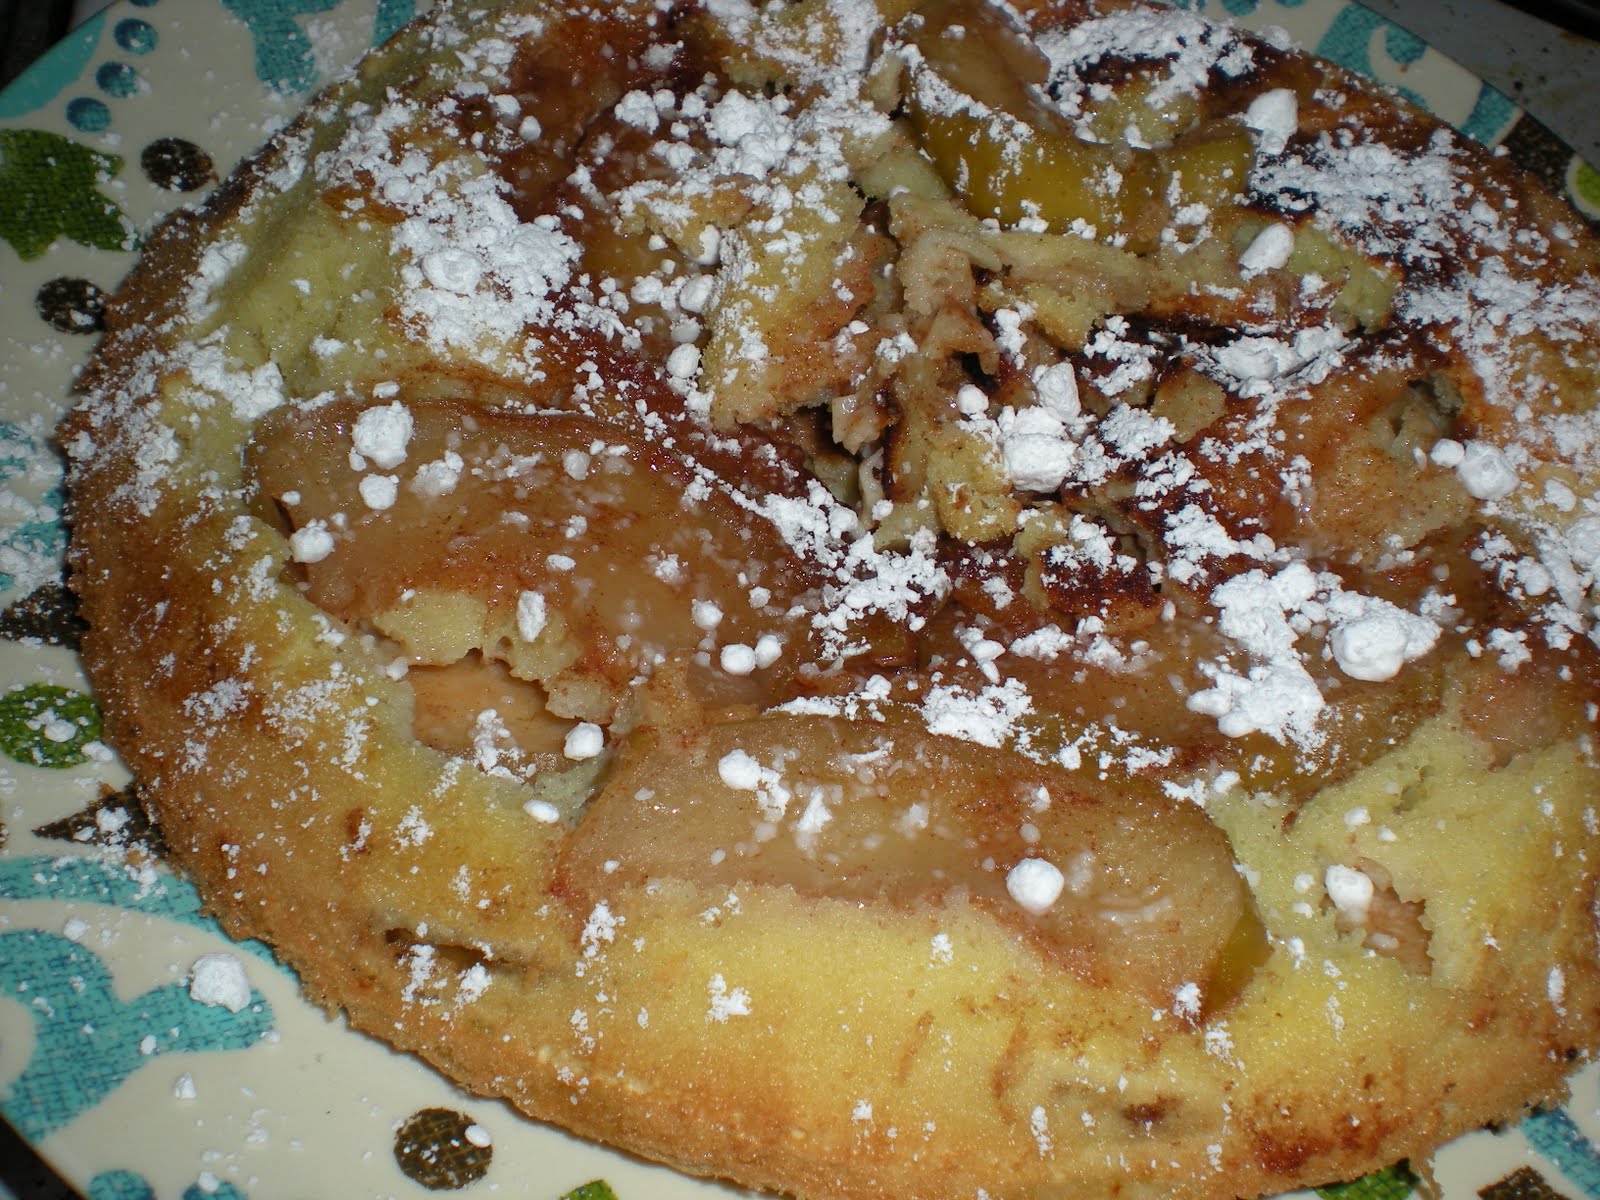 (In the fall, I plan on taking the Food Photography class. Until then, you will have to make do with my very poor photography skills. I will try to post a picture for each recipe, because I know that I at least have to see a picture of the food before I decide to make the recipe. :) )
I love breakfast--both the making and eating of it! I definitely enjoy baking and doing desserts more than cooking and dinners, and many breakfasts can actually be served as desserts too! This must be why I like them so much.
Every Saturday the hubby and I have a tradition of making a special breakfast together. To start off with my first recipe ever on this blog, I chose one that has always been one of my favorites growing up, and still is! I also usually make it for birthdays or extra special occasions because it looks real yummy and tastes delicious.
NOTE: For just two people, a pie pan is a good size (or it could even serve 4 if they are small eaters....not me! I could even eat a whole one all by myself, but I guess I'll just stick with half). Growing up, my brother was the one who usually made this breakfast, and he made it in a large pyrex casserole dish (double or triple the recipe for this) and just cut it into squares to feed our whole family.
Puffed Apple Oven Pancake (Originally from the Betty Crocker Cookbook)
2 Tbsp butter
2 Tbsp brown sugar
1/4 tsp cinnamon
1 baking apple, thinly sliced
2 lg. eggs
1/2 c AP flour
1/2 c milk
1/4 tsp salt
lemon juice, powdered sugar, fruit
Heat oven to 400. Beat eggs slightly with wire whisk or hand beater. Beat in the flour, milk and salt just until mixed, do not overbeat. Melt butter in pie plate (9 inch) in oven. Brush on sides of pie plate. Sprinkle the brown sugar and cinnamon over the melted butter. Arrange the apple slices over the sugar. Pour batter over the apples. Bake 30 minutes (or until puffy and golden-brown). Immediately loosen edge of pancake and turn upside down onto serving plate.** Sprinkle with lemon juice and powdered sugar (mmm...) and serve immediately.
**this is the best part because the butter and sugar on the bottom caramelizes with the apples. To have a successful flip, first loosen the edges with a knife all the way around. then put plate upside down on top of the pie plate. Then holding both, flip it over!


